My Development Setup on Windows 10/11

Why am I on Windows, you might ask? Most frontend developers are on Macs now a days, and I used to be as well. I had my MacBook Pro with a tonne of stickers. But when it became time to upgrade my trusty 2012 model, it became clear that most of the "upgrades" weren't upgrades at all. My computer ran better than most of the other devs laptops that were newer. I got more and more fed up with Apple and how they stopped looking at power users as a target demographic. So, I decided it was time to switch. And by switching, I got way more performance for less money.
Today my work horse is a Dell XPS 15, specifically the 1570 model. I am extremely happy with it, especially after switching out the WiFi module, adding more RAM and installing a bigger SSD.
I also knew that Microsoft was working on the Windows Subsystem for Linux, which I was really interested in. Having bash and zsh natively on macOS with it's FreeBSD roots was always amazing, but now that would be possible on Windows as well! I started with WSL as soon as it was released, but it just wasn't there yet. I jumped on the cmder train but now with WSL2 - and soon even having linux GUI apps, there's really no reason to not get on the bandwagon!
Install WSL2
If you are on the insiders preview channel for Windows and are using a preview version (build 20262 or higher), it's as easy as just running a command in Powershell: wsl --install
For the rest of us, we need to do a bit more. We'll start by enabling the Windows Subsystem for Linux. In an elevated Powershell, enter and run:
dism.exe /online /enable-feature /featurename:Microsoft-Windows-Subsystem-Linux /all /norestartThis will install and enable WSL. Now we need to enable the Virtual Machine Platform, that is needed for WSL2. Enter and run:
dism.exe /online /enable-feature /featurename:VirtualMachinePlatform /all /norestartAfter this you need to restart your computer. Windows will now automatically update WSL to WSL2 when booting. When you're up and running again, it's time to update the kernel version. Download the installer and run it:
WSL2 Linux kernel update package for x64 machines
Now all we have to do, is to set WSL2 to be the default version for all new installs of linux. Again, open up an elevated Powershell and run:
wsl --set-default-version 2Install Linux
Now for the fun stuff! If you don't know that much about the difference between linux distributions, you can read more about it here: https://www.makeuseof.com/linux-distros-for-windows-subsystem-for-linux/
If you don't have a preference, or are a bit inexperienced with linux, I would suggest Ubuntu. It's so common, you will have no problem finding any answers you may have and pretty much all tutorials out there are written with Ubuntu in mind. It uses apt as it's package manager which is really easy to use, much like npm.
In this tutorial, we'll be installing Ubuntu through the Microsoft Store:
Web Link - Direct Link
Once the install is done, you can find Ubuntu under your start menu. We need to start it once to let it install. A new terminal window will open up, and the installations begins. Once it is done, it will ask you to supply a username and password for your linux user. Note that this user has nothing to do with your windows user, and each installation of a linux distro will have it's own user.

Install Windows Terminal
The terminal that Ubuntu uses as default isn't that great. Thankfully, Microsoft have released Windows Terminal that is, quite frankly, amazing. It's totally open source and you can find the source code for it on Github, even!
To install it, let's head back to the Microsoft Store:
Web Link - Direct Link
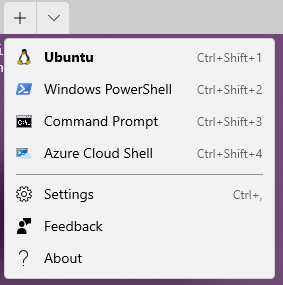
When opened up, you will per default find yourself at a Powershell prompt. If you click the little down arrow you will however see that Ubuntu is available in the list of shells you can open.
I personally want my WSL2 Ubuntu installation to be the default. Let's open the settings and make that change. Hit "Settings" in this menu, or press ctrl+, to open them.
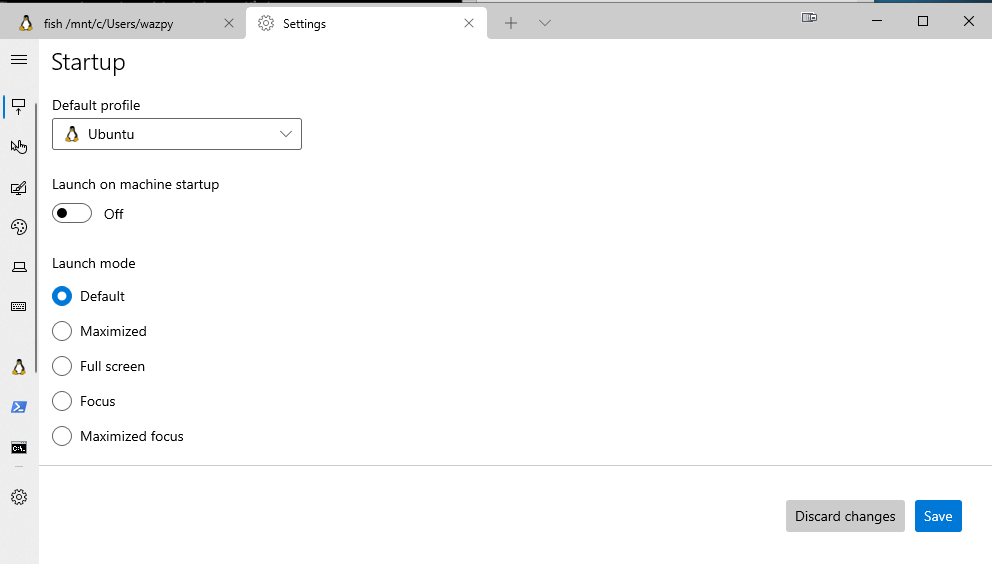
Simply just choose "Ubuntu" as your Default profile and hit "Save". Now, whenever you open up a new terminal instance, it'll load your Ubuntu instead.
Install fish
Bash is great, but I really do like Fish (Friendly Interactive Shell) more. It has a great setup as default when it comes to giving feedback on misspelled command names, and awesome autocomplete. For more information about Fish, and the differences compared to zsh and Bash, check out this blog post by Sid Mohanty.
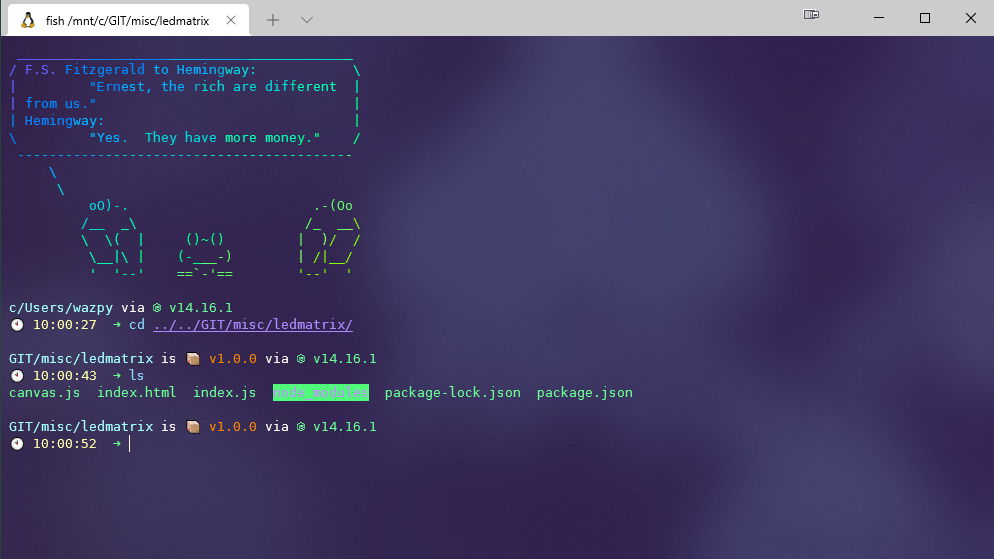
To install Fish, let's open up a Ubuntu shell in our Windows Terminal. This will load you into bash as standard. Type in, one line at a time:
sudo apt-add-repository ppa:fish-shell/release-3
sudo apt-get update
sudo apt-get install fish
This will first add the repository where we can find the install for Fish, update our repo database and finally install Fish.
When it's done, you can simply type fish at the prompt. If everything got installed correctly, you'll get dropped into our newly installed shell. Play around and try it out a bit. When done, let's get back to bash to set Fish as our default shell now that we know that it works:
exit
chsh -s `which fish`
exit will exit the currently running shell, in this case Fish. You'll automatically get dropped back into Bash. The second line stands for "change shell" and we're supplying the path to our installation of Fish by sending in which fish, which lists the path to whatever we want to find.
If you want to check so everything works, go ahead and close the Windows Terminal, and open it up again. It should load you into Ubuntu, with Fish as the active shell upon restart.
Install Starship prompt
The default prompt in Fish is highly configurable, but I use - and recommend - another alternative, called Starship. It can show a massive amount of information in the prompt, like the local time, git status, node.js versions etc.
Let's install it with:
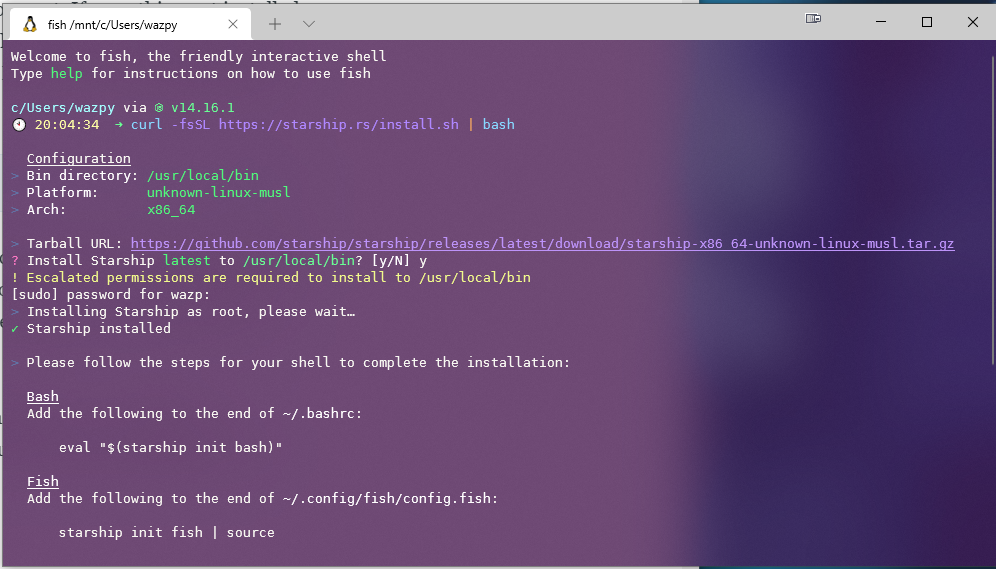
curl -fsSL https://starship.rs/install.sh | bashYou will have to confirm that you want to install it, and supply your password to get elevated access to install. Just follow the prompts in the installation and you'll be good. When finished, it'll print out some information about another change we need to make.
To add this, we need to open the settings file for Fish. We'll use the text editor Nano for this, but feel free to use whatever editor in the terminal you are comfortable with.
nano ~/.config/fish/config.fishThis is the Fish equivalent to .bashrc for Bash. It's a file that gets run every time a new shell is initialized, so the perfect place to put everything we need to happen when opening up a new shell.
We need to add one small command to the end of this file. This will load and init starship whenever we open a new fish shell. Add...
starship init fish | source...To the very end of this file. Press ctrl-x to close nano. It will ask you if you want it to "Save modified buffer?", so press y to save your changes. Upon restarting fish, you now have Starship loaded as your prompt.
What're these strange symbols?
You might notice that you have some strange, broken symbols when entering certain directories, like a git repo. This is because Starship uses nerd fonts that includes icons. This is easily remedied by installing your choice of nerd font and setting it as your font in the Windows Terminal settings. I definitely recommend DejaVu Sans Mono, which is my choice of font in all my different IDEs and editors.
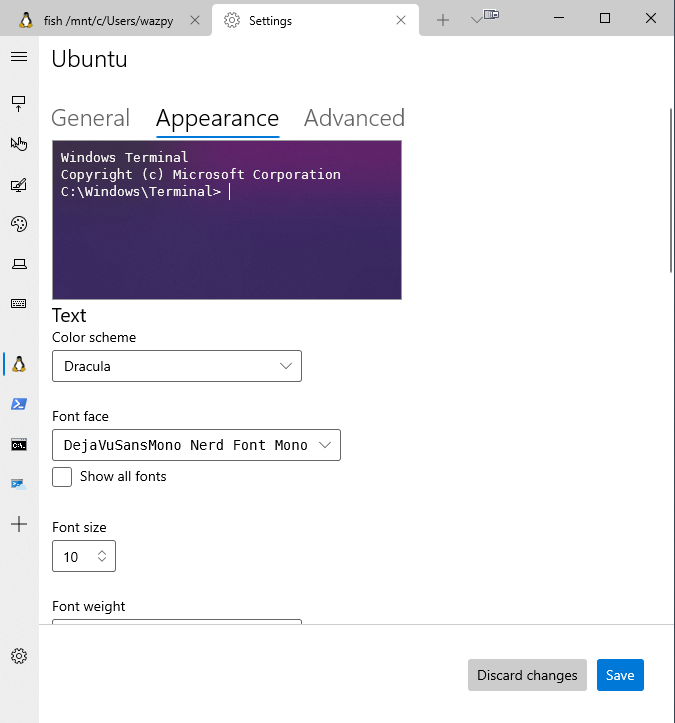
After saving your settings and going back to your Fish tab, you will see that the icons are now showing.
Node.js with nvm
We also don't have a node installed for our Ubuntu, so let's take care of that. nvm is a great solution, which lets you have multiple versions of Node installed at the same time - perfect for developers who have different requirements in different projects - especially when dealing with legacy clients and maintenance.
nvm however, doesn't work with Fish as standard, as it's only compatible with POSIX-compliant shells, which Fish isn't. However, there's a quick workaround for that. Let's start by installing Fisher, a plugin manager for Fish:
curl -sL https://git.io/fisher | source && fisher install jorgebucaran/fisherWith Fisher installed, we can install bass (seeing the awesome naming convention here?), which makes it easy to use utilities that are written for Bash, "by capturing what environment variables are modified by the utility of interest, and replay the changes in fish."
fisher install edc/bassWhen this is done, it's time to install nvm. Simply run this in the shell:
curl -o- https://raw.githubusercontent.com/nvm-sh/nvm/v0.38.0/install.sh | bashAt the time of writing this, the latest version of nvm was 0.38.0, I would suggest looking on the nvm github what the latest version is when you are doing this.
Now, let's create a new Fish function for of nvm. You can see functions as aliases for Bash, but on steroids. Let's create a new function and call it nvm.fish:
nano ~/.config/fish/functions/nvm.fishThis opens up a new file in Nano, so let's add our function to it that will be called every time we run nvm in fish:
function nvm
    bass source ~/.nvm/nvm.sh --no-use ';' nvm $argv
end
As you can see in the function, we are sending everything we do through bass, who wraps the shell script for nvm. This way we get all the correct paths and environment variables in there correctly.
Now you can install any version of node, by simply typing in nvm install <version>. I would suggest you install the latest Long Term Support version as your main version by:
nvm install --lts
nvm alias default 'lts/*'
This installs the latest LTS version, and sets it as the default version for nvm. You can now simply install other versions of nodejs by changing out the version number, and switch between them with nvm use <version>. To easily get back to the LTS version, simply type in nvm use default and whatever default version is set will be loaded. Sweet!
If you use multiple different programming languages, you could also check out asdf as an alternative to nvm. Official plugins exists for Elixir, Erlang, Node.js and Ruby, with more options available as community plugins.
Only one more thing to do; we need to add config for nvm to load our default version on Fish start. Again, open up the fish config file with nano ~/.config/fish/config.fish and add nvm use default --silent to it, right above where you initialize Starship. Without this step, you will have to run nvm manually once on every start before you can run node or npm.
We are now done with the setup of Fish. You have an awesome shell, with an amazing prompt, and sweet version management of Node.js. The only thing left to do is to make sure that the terminal in VS Code works as good!
VS Code
Visual Studio Code works extremely well together with WSL2. When you open it the first time by writing code . in a directory you want to open, it'll install the server version of VSCode. It then opens up your regular one, and remotely connects to your Linux installation - complete with all your extensions etc.
If you open up the terminal in VS Code, you'll see that it actually loads fish in there as well, in the context of your WSL2. Amazing!
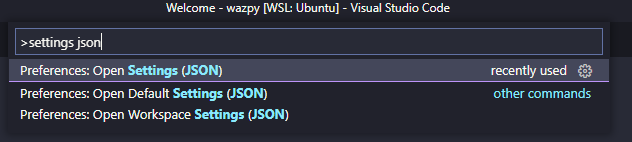
You might notice though, that the font isn't looking too great. This is easily remedied by hitting ctrl-shift-p to open up the command palette, and search for settings, and choosing "Preferences: Open Settings (JSON)
Tip: The Windows Terminal have a command palette as well, with the same keybind!
This will open up the settings json file in your VSCode. If you haven't added anything at all in here yet, it might be empty. If that's the case, just copy/paste the following exactly. If you already have keys in there, make sure the brackets and colons are correct. It should be on the first level of the json.
{
  "terminal.integrated.fontFamily": "DejaVuSansMono Nerd Font Mono",
  "terminal.integrated.fontWeight": 400,
  "terminal.integrated.fontWeightBold": 500
}
This will load the same font we added to Windows Terminal in the VSCode terminal, and make the text look less bulky and much easier on the eyes.
Starship for Powershell?
Yes, starship works real well together with Powershell as well, so if you want to, you can add it there as well for a more unified terminal experience. You will want to install scoop, and then install Starship with scoop install starship.
To start it on every instance of powershell, add the following to your Microsoft.Powershell_profile.ps1. This file can be in different locations, but usually under ~\Documents\PowerShell\Microsoft.PowerShell_profile.ps1.
Invoke-Expression (&starship init powershell)